
Ever stared in the mirror, scissors in hand, wondering if you could pull off that fade without booking a salon slot? Yeah, me too. Back in my early twenties, I was broke and impatient—waiting two weeks for a haircut felt like forever. So I grabbed some clippers and dove in. It wasn’t perfect (think uneven sideburns), but it saved me cash and sparked a habit that’s stuck. If you’re dipping your toes into the beginner’s guide to cutting your own hair at home with clippers, you’re in good company. Millions do it now, especially since the pandemic turned bathrooms into makeshift barber shops. This isn’t about going pro overnight. It’s about starting simple, staying safe, and nailing that fresh look without the hassle. We’ll break it down step by step, from gear to gotchas, so you walk away confident. Let’s clip away the doubt.
Look, barbers are wizards, but life’s too short for endless appointments. Cutting your own hair lets you experiment on your schedule—buzz it short for summer or fade the sides for work. And the savings? A pro trim runs $20-40 a pop. Do that monthly, and you’re looking at $240 a year. Pocket that for tacos instead.
But it’s more than money. There’s this quiet power in handling it yourself. I once watched a buddy transform a bad breakup into a bold undercut right in his kitchen. Therapeutic, right? Data backs it up: a 2023 Grooming Insights poll found 62% of guys under 35 trim at home at least once a month, citing convenience as the big win. For women, it’s edging up too—think quick trims on bobs or layers. The catch? Without the right approach, you risk a patchy mess. That’s why this guide sticks to clippers: they’re forgiving for newbies, versatile for styles from clean crops to textured tops. No fancy shears needed. Just you, a mirror, and some grit.
Of course, not every style suits solo cuts. If you’re rocking long waves or intricate braids, leave it to the experts. But for short to medium lengths? Clippers are your ticket to freedom. And hey, if it goes sideways, hats exist for a reason.
Don’t skimp here—cheap gear leads to frustration. Good clippers hum smoothly, hold a charge, and slice clean without tugging. Aim for cordless models with adjustable guards (those plastic combs that set length). Battery life matters too; nothing kills the vibe like a dead tool mid-fade.
Here’s a quick rundown of must-haves. I’ve tested a bunch over the years, and these basics keep it simple.
| Tool | Why It Matters | Pro Tip |
| Cordless Clippers | Quiet motor, 90+ minute runtime—enough for multiple sessions. Look for stainless steel or titanium blades to avoid rust. | Go for 5W power; it’s plenty without overheating your hand. |
| Guard Set (1/16″ to 1″) | Snaps on for even lengths. Start with #2 (1/4″) for sides. | Washable ones save cleanup time—hair everywhere is the worst. |
| Detail Trimmer | For edges, necklines, and sideburns. Lighter than full clippers. | Pair it with your main set for that barber-sharp finish. |
| Mirror Setup (Handheld + Wall) | See the back without twisting like a pretzel. | A cheap swivel mirror from the drugstore changed my game. |
| Comb & Spray Bottle | Sections hair wet for straighter cuts. | Mist lightly—soggy hair weighs it down funny. |
| Cape or Old Towel | Catches clippings so your floor doesn’t look like a fur factory. | Drape it loose; tight ones pull and distract. |
Budget $50-100 for a solid starter kit. I’ve seen folks regret the $20 specials—they snag and die fast. And blades? Oil ’em weekly with a drop or two; it’ll double their life. Oh, and grab some aftershave balm. That post-cut sting? Not fun.
Alright, setup time. Pick a spot with killer lighting—bathroom fluorescents are brutal, so hit the garage if it’s sunny. Lay down newspaper or that towel; sweeping up clippings mid-cut is a buzzkill. Plug in (or charge up) and test your clippers. They should glide like butter on a warm knife.
Now, hair prep. Wash it fresh—no product buildup means cleaner lines. Towel-dry to damp; wet hair cuts shorter than it looks dry, so account for that shrinkage. Comb through to detangle. If it’s curly, stretch sections gently—coils bounce back post-cut.
Mental prep counts too. Breathe. Queue up a podcast. My go-to? True crime keeps me focused without overthinking. And lengthen your guards first—better to trim twice than regret once. Got a style pic? Pin it nearby. Apps like YouTube have endless tutorials, but stick to basics till you’re comfy.
One quirky aside: I always light a candle. Not for vibes, but the scent masks that metallic clipper smell. Small wins.
Here’s the meat—your roadmap. We’ll focus on a classic short fade: high and tight on sides, textured top. Adapt as needed, but start conservative. Total time? 20-30 minutes once you’re rolling.
Divide your hair like pie slices. Use clips or ties to isolate the top—leave 2-3 inches for blending later. Start with the #2 guard on sides and back. Hold clippers like a pencil, teeth up, and go against the grain (upward on sides). Slow strokes, no pressing—let the blades do the work.
Pro move: Overlap passes by half an inch. Uneven? Feather the edges with the trimmer. I botched my first nape line this way—looked like a staircase. Lesson learned: tilt your head forward for the mirror check.
Swap to #1 guard for the lower fade. Blend upward into your #2 section. Flick the wrist at the end of each stroke for softness—it’s like painting a gradient. Back of the neck? Buzz horizontal lines, then connect. If your hair grows wonky (cowlicks, anyone?), follow the natural swirl.
Data point: Barbers say 70% of at-home mishaps hit the fade zone. Why? Rushing. Take breaks. Sip water. Your arms thank you.
Remove guards for the top—scissor over comb if you’re nervous, or freehand clip for texture. Comb up, snip at a 45-degree angle for layers. Want volume? Leave it longer in front, point-cut the ends (snip into the tips vertically). Dry and style to preview—pomade or sea salt spray tests the flow.
Women, same drill for bobs: Section sides, clip to chin length, then layer the back. Curly folks? Cut dry to see the curl pattern.
Trimmer time. Outline ears, arch brows lightly (don’t overdo—I’ve seen regrets), and carve that neckline. Straight razor for ultra-close? Skip unless you’re steady. Dust off with a brush, then shower the cape.
Voila. Step back. It’s yours.
We all slip. I once clipped a bald patch chasing a stray hair—hello, hat week. Common traps? Over-clipping (guilty), ignoring angles (sides go crooked), or dull blades pulling skin. Fix: Sharpen blades monthly or swap ’em.
Another: Lighting lies. What looks even under the lamp? Wonky in daylight. Always double-check post-shower. And rushing the blend—fades need patience, like good coffee.
Stats from the International Guild of Professional Barbers: 45% of self-trimmers quit after one bad round. Don’t. Practice on a wig first if you’re sketched.
Cut done? Now maintain. Weekly trims keep edges crisp—5 minutes tops. Clean clippers post-use: brush out hair, wipe blades, store dry. Oil that motor, folks; neglect it, and it’ll whine like an old door.
For hair: Moisturize. Clippers dry it out, so hit with conditioner. Scalp massages? Gold for growth—studies show they boost circulation by 20%. And sun? Hat up; UV fades color fast.
Touch-ups: Every 7-10 days for fades. Tops? Bi-weekly. Track with a calendar app. Pro tip: Film your process. Watching playback spots flaws you miss in the moment.
Oh, random thought—ever notice how a fresh cut boosts your mood? Science says endorphins spike from the control. Weird, but true.

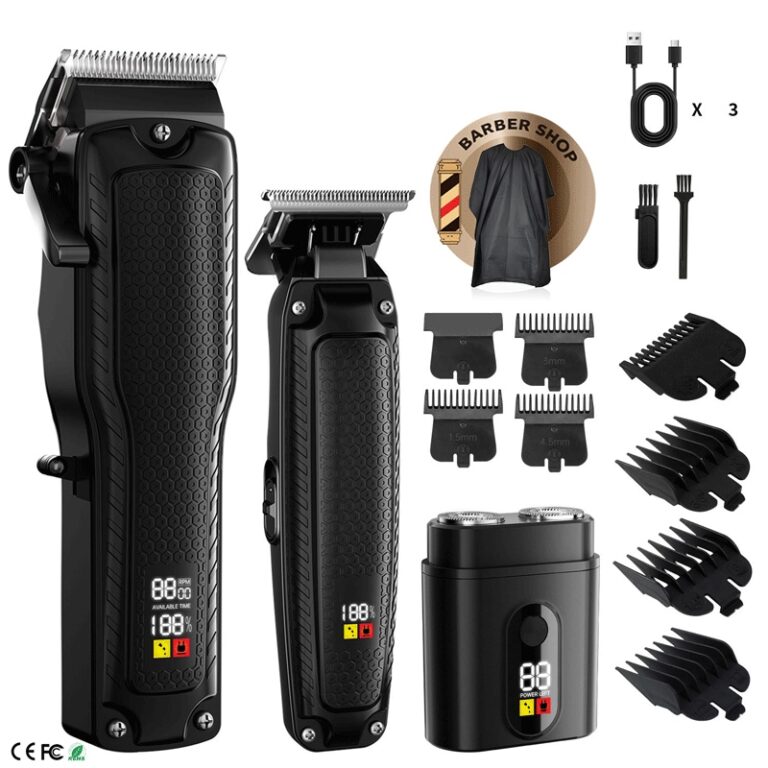
When you’re ready to level up your setup, check out SUOKE Electric. They’re a solid player in the personal care game, cranking out reliable clippers from their base in Zhejiang, China. Think cordless models with LCD displays for battery checks, titanium blades that stay sharp, and runtimes pushing 90 minutes on a single charge. Their kits come with adjustable guards, detail trimmers, and even USB charging for on-the-go vibes. SUOKE focuses on OEM/ODM, meaning they tailor gear for everyday folks like us—washable heads for easy cleanup, ergonomic grips that don’t cramp your style. I’ve eyed their SK-L14 series; it’s got that IPX3 waterproofing for worry-free rinses. Not flashy, just built to last. If home cuts are your jam, their stuff makes the ritual smoother.
There you have it—the blueprint for the beginner’s guide to cutting your own hair at home with clippers. From that first awkward buzz to dialing in your signature fade, it’s all about practice and patience. Sure, you’ll have off days (we all do), but the wins? Priceless. Save the dough, own your look, and who knows—maybe you’ll skip the salon for good. Grab those clippers, hit play on your playlist, and get after it. Your mirror self’s cheering you on.
Hands down, nailing the fade. It takes a few tries to blend without lines, but start with longer guards and build down. Patience beats perfection every time.
Nah, not at first. A basic cordless set with guards does the trick. Just ensure it’s got a decent battery—nothing worse than quitting halfway.
Every week or two for edges, monthly for the full shebang. Keeps it tidy without overdoing it. Listen to your growth; some heads sprout faster.
Absolutely, but cut dry to see the curls pop. Section tight and use a diffuser guard if yours has one—avoids flattening the bounce.
No sweat. Grow it a bit, then even it out next round. Or hit a barber for a reset—they’ve seen worse. Hats are temporary heroes.